(https://javawithgriff.blogspot.com/)
Thursday, May 31, 2018
Tuesday, May 1, 2018
Friday, February 16, 2018
Photoshop: Collage
Today and tomorrow we are going to build a collage that we can use as a computer wallpaper. The collage must have a theme, include several images, have some sort of text (i.e. a title), and fit the dimensions of a typical computer screen.
 You will have the next two days to build your collage.
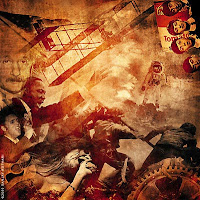
Here are some examples of Photoshop collages:


 You will have the next two days to build your collage.
- Create a new Photoshop document using your choice of the following dimensions: (Dimensions from W3Schools 9/19)
- 1366x768 (18.7% of computer screens use this resolution)
- 1024x768 (13% use this resolution)
- 1280x1024 (11.5%)
- 1280x800 (10.7%)
- 1440x900 (8.1%)
- Sometimes it's better to fill your canvas with a certain color (i.e. black, blue, or green) to serve as a base for your pasted images, although you can create some interesting collages by using a textured background or even an image (i.e. the example showing Asian writing).
- Begin finding images [within your theme as well as being classroom appropriate] and save them to a folder on your Thawspace or USB drive. Make sure the images are large enough that you don't have to stretch them on your canvas.
- Begin "pasting in" images and dragging them to the best fit on your canvas.
- You may want to use a soft, feathered brush as an eraser and soften the edges of your images.
- You may also want to try adjusting the opacity on some of your images [layers] to help the layers "melt together" better.
- You may even try a color gradient overlay with low opacity for some interesting effects.
- Choose a font that fits your theme, and place a title on your page.
- Choose a small font and put your name on your new artwork.
- Try some layer styles (drop shadows, bevel & emboss, stroke, etc.) to improve your text layer.
Here are some examples of Photoshop collages:


Thursday, February 15, 2018
Photoshop: Colorize (Spray On Layer)
Today we will be learning to colorize a black and white image. The image we are starting with, however, is already in color. What we will do is take this image into PhotoShop, convert it to black & white, then colorize it.
1. Click on the image (below) to view it full-size.
 2. Right-click and save the image to your folder.
3. Open the image in PhotoShop.
4. Convert it to Black & White by going to: IMAGE > MODE > GRAYSCALE
5. Balance it by going to: IMAGE > ADJUSTMENTS > AUTO CONTRAST
6. Convert the image back to RGB Color by going to: IMAGE > MODE > RGB COLOR
7. Create a new layer: LAYER > NEW > LAYER
8. Pick a bright color (pink, blue, red, etc.)
9. Choose a soft (feathered) brush and paint on your new layer over an object (hat, pants, overalls, etc.). Don't worry about the bright, ugly color because we're going to adjust that in the next step.
10. Next, adjust the opacity (transparency) of your painted layer by clicking the arrow next to OPACITY above the Layer. Drag the arrow left or right to adjust the opacity.
This is a quick example of the project:

Here are a few examples of adding color to a black & white photograph to create different effects:


If [for some reason] you don't see your layers, click F7.
Also, if you have access to YouTube you can check out this video tutorial that I put together a few years ago. It's on a Macintosh, but the concepts are the same:
1. Click on the image (below) to view it full-size.
4. Convert it to Black & White by going to: IMAGE > MODE > GRAYSCALE
5. Balance it by going to: IMAGE > ADJUSTMENTS > AUTO CONTRAST
6. Convert the image back to RGB Color by going to: IMAGE > MODE > RGB COLOR
7. Create a new layer: LAYER > NEW > LAYER
8. Pick a bright color (pink, blue, red, etc.)
9. Choose a soft (feathered) brush and paint on your new layer over an object (hat, pants, overalls, etc.). Don't worry about the bright, ugly color because we're going to adjust that in the next step.
10. Next, adjust the opacity (transparency) of your painted layer by clicking the arrow next to OPACITY above the Layer. Drag the arrow left or right to adjust the opacity.
This is a quick example of the project:

Here are a few examples of adding color to a black & white photograph to create different effects:


Also, if you have access to YouTube you can check out this video tutorial that I put together a few years ago. It's on a Macintosh, but the concepts are the same:
Photoshop: Colorize (Spray On Layer)
Today we will be learning to colorize a black and white image. The image we are starting with, however, is already in color. What we will do is take this image into PhotoShop, convert it to black & white, then colorize it.
1. Click on the image (below) to view it full-size.
2. Right-click and save the image to your folder.
3. Open the image in PhotoShop.
4. Convert it to Black & White by going to: IMAGE > MODE > GRAYSCALE
5. Balance it by going to: IMAGE > ADJUSTMENTS > AUTO CONTRAST
6. Convert the image back to RGB Color by going to: IMAGE > MODE > RGB COLOR
7. Create a new layer: LAYER > NEW > LAYER
8. Pick a bright color (pink, blue, red, etc.)
9. Choose a soft (feathered) brush and paint on your new layer over an object (hat, pants, overalls, etc.). Don't worry about the bright, ugly color because we're going to adjust that in the next step.
10. Next, adjust the opacity (transparency) of your painted layer by clicking the arrow next to OPACITY above the Layer. Drag the arrow left or right to adjust the opacity.
This is a quick example of the project:
Here are a few examples of adding color to a black & white photograph to create different effects:
If [for some reason] you don't see your layers, click F7.
Also, if you have access to YouTube you can check out this video tutorial that I put together a few years ago. It's on a Macintosh, but the concepts are the same:
1. Click on the image (below) to view it full-size.
4. Convert it to Black & White by going to: IMAGE > MODE > GRAYSCALE
5. Balance it by going to: IMAGE > ADJUSTMENTS > AUTO CONTRAST
6. Convert the image back to RGB Color by going to: IMAGE > MODE > RGB COLOR
7. Create a new layer: LAYER > NEW > LAYER
8. Pick a bright color (pink, blue, red, etc.)
9. Choose a soft (feathered) brush and paint on your new layer over an object (hat, pants, overalls, etc.). Don't worry about the bright, ugly color because we're going to adjust that in the next step.
10. Next, adjust the opacity (transparency) of your painted layer by clicking the arrow next to OPACITY above the Layer. Drag the arrow left or right to adjust the opacity.
This is a quick example of the project:
Here are a few examples of adding color to a black & white photograph to create different effects:
Also, if you have access to YouTube you can check out this video tutorial that I put together a few years ago. It's on a Macintosh, but the concepts are the same:
Photoshop: Colorize by Erasing Layers
Colorize an Image by Erasing Layers
Another interesting way of "colorizing" an image is by pasting a black and white layer on top of the color layer and erasing the areas you want in color. Confusing? It will make sense after we try it.
Here's a sample image to get started [of course you can use your own]:

- Open an image.
- Do a CTRL+A (to "Select All") then CTRL+C (to "Copy)
- Go to Image > Mode > Grayscale to convert the image to grayscale ("black & white").
- Go to Image > Mode > RGB Color to convert the image back to color.
- Do a CTRL + V (to "Paste").
- Double-Click the bottom layers name ("Background") and change it to anything else (i.e. "Layer 0").
- Drag the bottom (grayscale) layer above the color layer.
- Select a soft (feathered) brush small enough to get details.
- Use the eraser tool to erase areas you want in color.
Next, locate another image where you can perform the same steps. Make sure to add your finished projects to your portfolio.
Some Examples:


Some Examples:


You can also view the video tutorial below for step-by-step instructions:
Subscribe to:
Posts (Atom)