Thursday, September 28, 2017

Photo Editing #7: The Gondola

Assignment:  We have accepted an assignment from a client to take a dull, scanned photograph and improve it for use in a poster, brochure, web site, etc.  The client has scanned a photograph of a gondola, but they think it is too hazy... and they don't like the speedboat in the center of the picture... and "the colors are a little blah".  We will use PhotoShop to correct these issues... and more.

Photoshop Tools/Options Used:
  • Ruler
  • Rotate Canvas
  • Crop
  • Levels
  • Clone Stamp
  • Dodge
  • Burn
  • Replace Color
  • Magic Wand
  • Paste Into
  • Free Transform

We will be using the following images to create our final project:
(Right-click each image and save to your computer, then open them in Photoshop.)


Part I: We will begin with the Gondola picture (p_start.psd):
  • Select VIEW > FIT ON SCREEN (shortcut is CTRL+0) to see the image as large as possible
  • Select the RULER tool (sometimes it's hidden under the EYEDROPPER) -- a shortcut is SHIFT+I which toggles through that toolset.
  • Drag the ruler along an edge that should be straight (i.e. the edge of the tower).
  • Select IMAGE > ROTATE CANVAS > ARBITRARY...
  • A suggested rotation is already in place based on your ruler line (this tool is trying to make the ruler line vertical or horizonal)... so click OK.
  • Use the RECTANGULAR MARQUEE tool (the box shape) to select as much of the picture as possible without including the black border (it's okay if you don't get all of the photo in the square).
  • Select IMAGE > CROP
  • Select VIEW > FIT ON SCREEN (again, to see the maximum image size)
  • Select IMAGES > ADJUSTMENTS > LEVELS
  • Drag the "black triangle" in toward the very beginning of the "mountain range" -- and do the same for the "white triangle" (click the "Preview" box to toggle this change to preview what it is doing) then click OK.
  • You now have a brightened, cropped image to work with for the next part.
Part II: Removing the Motor Boat / Using the Clone Stamp
  • Click the CLONE STAMP tool
  • Move your pointer over to a clear area of water -- about the same distance/depth as your motorboat (i.e. somewhere in the same horizontal line) and ALT+CLICK.
  • Move your mouse over to the center of the motorboat and slowly paint over the boat.  Notice the "+" shape where the CLONE STAMP is copying from.
Part III: Adjusting Highlights and Shadows
  • Click the DODGE tool (it looks like a black pushpin) and set the Range for HIGHLIGHTS and the Exposure to around 10%.
  • Adjust your brush size as necessary with the [ and ] keys.
  • Brush over the red and white striped tarp and notice how the highlights are getting brighter.  Try this on other tarps and the side of the boat which seems to get shinier.
  • Click the BURN tool (it looks like a hand pinching and is found under the DODGE tool) and set the Range for SHADOWS and the Exposure to around 5%.
  • Adjust your brush size as necessary with the [ and ] keys.
  • Brush over the boats/tarps just to get a little contrast.
Part IV: Replace the Orange Tarp
  • Use the ZOOM tool (it looks like a magnifying glass) to zoom in on the orange tarp -- making sure you can see the entire thing.
  • Use the LASSO tool and draw around the orange tarp (making a selection)
  • Select IMAGE > ADJUSTMENT > REPLACE COLOR
  • Click on the orange part of the orange tarp.  You should see a faint "mask" of the orange shape appear in the Replace Color box.
  • Hold down the SHIFT key and Click and Drag around the orange tarp trying to select ONLY the orange areas.  If you over-select (i.e. you accidentally go into the black) you can start this step over.
  • When you feel like you have a nice, sharp "mask" of the orange tarps shape, drag the HUE slider left and right.  Notice the colors changing on your image.
  • If you adjust the SATURATION slider and the LIGHTNESS slider, you can actually match the colors of the other tarps on the boat.
Part V: Make Blue Skies From Gray
  • Open the Clouds picture (p_clouds.psd).
  • Click on SELECT > ALL (or do CTRL+A)
  • Select EDIT > COPY (or do CTRL+C)
  • Go back to your Gondola picture.
  • Click the MAGIC WAND tool (SHIFT+W toggles this)
  • Click in one of the "gray" areas of the sky and notice how it selects some of the building tops.  We don't want that.
  • Drop your TOLERANCE down to 10 and see how that works.  Notice that it [probably] doesn't select the entire piece.  We can compensate for that by holding SHIFT and clicking in the "unselected" areas.
  • Continue SHIFT-Clicking the other "gray" areas of the sky throughout the picture.
  • Select EDIT > PASTE INTO (not PASTE)
  • Notice how ugly and unnatural this looks?  Don't worry -- go over to the OPACITY setting (above your LAYERS) and drag that down until it looks natural.  Mine is about 37% [this time].
  • When you are satisfied with your final product, select LAYER > FLATTEN IMAGE.
Part VI: Make the Before and After
  • Go to IMAGE > CANVAS SIZE
  • Change "inches" to percent and change the width (since this is a picture that is taller than it is wide, a side-by-side comparison works best -- so we will adjust the width) and change the 100 to 200 (making it twice the width).
  • Click on the Right Arrow (this means you want your current picture -- the "after" -- to be on the right) and click OK.
  • Copy your original image (in this case, p_start.psd) and Paste it into your finished image.  Use the MOVE tool (the black arrow) to drag it to the left side.
  • You may want to use your FREE TRANSFORM to rotate and resize the original so it fits better.
  • Add your name to the finished image.
  • Save your completed file as a JPEG image to your Thawspace. 
Part VII: Add to Your Portfolio
  • Go to your Blog (http://www.blogger.com/) and sign into your account.
  • Click New Post and make sure "Compose" is selected.
  • Click the IMAGE/PICTURE button.
  • Browse for your picture (from your Thawspace).
  • Add a description about the steps you completed or the process you used in putting this together.  You could even add the reason you did the project (e.g. A virtual client wanted you to clean up an image to use for print/online media).
  • Click PUBLISH POST.
  • Click VIEW BLOG.
If you have difficulty following along and would like to work on this from home, here is a tutorial using the same images:


Wednesday, September 27, 2017

Photo Editing #6: Facebook Cover Photo

Today we will be creating a cover photo for a Facebook page:
  • Width: 851 Pixels (NOT Inches)
  • Height: 315 Pixels (NOT Inches)
  • Resolution: 100 PPI (Pixels Per Inch)
Here's a Facebook Cover Photo template:

Here is the cover photo I created for my Facebook:
 Notice, however, that you have to keep your profile picture in mind when designing your picture:

Tuesday, September 26, 2017

Test


By adding a ground (grass) and sky texture:


\\JHS-LAB-M16\Users\LabSoftware

Monday, September 25, 2017

Photo Editing #5: Colorize an Image (Erase a Layer)

Colorize an Image by Erasing Layers

Another interesting way of "colorizing" an image is by pasting a black and white layer on top of the color layer and erasing the areas you want in color.  Confusing?  It will make sense after we try it.

Here's a sample image to get started [of course you can use your own]:
  1. Open an image.
  2. Do a CTRL+A (to "Select All") then CTRL+C (to "Copy)
  3. Go to Image > Mode > Grayscale to convert the image to grayscale ("black & white").
  4. Go to Image > Mode > RGB Color to convert the image back to color.
  5. Do a CTRL + V (to "Paste").
  6. Double-Click the bottom layers name ("Background") and change it to anything else (i.e. "Layer 0").
  7. Drag the bottom (grayscale) layer above the color layer.
  8. Select a soft (feathered) brush small enough to get details.
  9. Use the eraser tool to erase areas you want in color.
Next, locate another image where you can perform the same steps.  Make sure to add your finished projects to your portfolio.

Some Examples:


You can also view the video tutorial below for step-by-step instructions:

Friday, September 22, 2017

Sweet Home 3D

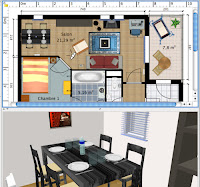
Today we will begin exploring features of Sweet Home 3D -- a free 3D home design program which does rendering, animation, etc. The program has an active developer community and a lot of extra models you can download for free.

There are two ways to run the program:
Unfortunately our school computers will not support the online version of the program.  We will be attempting to download and install the software to our school computers:

Installation: Before beginning any software installation, I recommend you restart your computer.
  1. Click Here to download.
  2. When it has finished downloading (see the tab at the bottom of your screen) click it.
  3. When prompted, click "RUN" and then "YES" to begin installation.
  4. Click "ENGLISH" then "OK".
  5. Click "I accept the agreement" and "Next".
  6. Click "Next" to accept the "path" 
  7. Click "Next" to accept the name 
  8. Click "Next" to create the desktop shortcut
  9. Click "Install" to begin the actual installation
  10. Click "Finish" to launch the program for the first time
Today we will begin exploring features of Sweet Home 3D -- a free 3D home design program which does rendering, animation, etc. The program has an active developer community and a lot of extra models you can download for free.

Sweet Home 3D: http://www.sweethome3d.com
Sweet Home 3D Models: http://www.sweethome3d.com/importModels.jsp

Our goal over the next few days is to design a house with at least one bedroom, a kitchen, a living room, and a bathroom.  You are welcome to create additional bedrooms, a family room, a garage, a workshop, or whatever.  Just have fun with it.

When you are finished, take some "photos" (renderings) of different rooms and/or angles to put on your portfolio.
This video tutorial does a pretty good job of showcasing the tools in Sweet Home 3D -- although it's a much earlier version:

Homework: Measure a Room

HOMEWORK ASSIGNMENT #1: MEASURING A ROOM

I will be handing out a sheet that you can use to measure a room -- it can be a room in your house or a friends house (bedrooms usually work well) or a room at the school or a room at a local business.  You will be measuring the dimensions of the room (length, width, and height) and the locations for major architectural features (windows, doors, closets, etc.) as well as making notes about what materials are used (e.g. blue carpet, red paint, flower wallpaper, etc.).  We will be using these dimensions and material ideas to build the room in 3D.  Feel free to make notes on the back of the paper (materials, colors, etc.).

Try to measure everything in inches -- for example, if the room was 10 feet long it would be 120 inches.  If a door was 7 feet tall it would be 84 inches.  Note that while the tiny squares on the Grid Layout are inches, the larger (darker) squares are in feet.
If you need another copy, you can get one here:  Grid Layout

Photo Editing #8: Coloring a Line Art

Coloring a line art image is basic on the surface, but to really get a quality result [and something you can get creative with] you should begin by separating the black lines from the white page.  Here are some steps to help you through this project:
Step 1: Begin by finding a good example of a line art image.  You can specify in your Google Search that you want large, line art images -- try this search for an example.
PHOTOSHOP:

Step 2: Do a SELECT > COLOR RANGE and then click on the white area of your picture.  Drag the "fuzziness" up a bit to catch any straggler pixels.
Step 3: Press DELETE and also delete the background layer.  You should see a line art image with a checkered [transparent] background.
Step 4: Create a new layer and drag it beneath the Line Art layer.  Use the paintbrush to put down a good "foundation coat" which you can do without worrying about the lines.
Step 5: Click on the Line Art layer, select the Magic Wand tool, and click on the empty background area.  This should select everything around the object you are coloring.  Now click back on the "foundation coat" layer and press DELETE.  This should clean up the edges of your object (see above).
Step 6: Use your DODGE tool (looks sort of like a round push pin) and a small brush to add some highlights to areas where you would expect to see them.  In this example I assumed the light was coming from the top-left so I added highlights to the top of the dome, the top of the instruments, and along the tops of other ridges.
Step 7: Use the BURN tool (looks like a pinching hand) and a small brush to add "shadows".  I added shadows on the underside of instruments, under the lips of overhangs, under the extending spheres, etc.
Step 8: If you have spherical/rounded objects (such as the circles on the bottom of the Dalek), go to the Line Art layer and select the object(s).  If you have multiple objects (above) hold shift and select all of them.  Then I like to expand the selection a little by going to SELECT > MODIFY > EXPAND and then 1 pixel.  This will allow the new layer to slightly expand beyond the "holes you're putting them in.
Step 9: Create a new layer and use the paintbrush to paint into your selections.  We will add a bevel to these new pieces in the next step.
Step 10: Go to LAYER > LAYER STYLE > BEVEL & EMBOSS and adjust the settings until you get the roundness you want.
Step 11: Add details, textures, colors, etc.
Step 12: You can also add a background and a foreground if you choose.

Here are a couple more examples:


Photo Editing #4: Colorize a Black & White (Spray On Color)

Today we will be learning to colorize a black and white image.  The image we are starting with, however, is already in color.  What we will do is take this image into PhotoShop, convert it to black & white, then colorize it.

1.  Click on the image (below) to view it full-size.
2.  Right-click and save the image to your folder.

3.  Open the image in PhotoShop.
4.  Convert it to Black & White by going to:  IMAGE > MODE > GRAYSCALE
5.  Balance it by going to: IMAGE > ADJUSTMENTS > AUTO CONTRAST
6.  Convert the image back to RGB Color by going to:  IMAGE > MODE > RGB COLOR
7.  Create a new layer:  LAYER > NEW > LAYER
8.  Pick a bright color (pink, blue, red, etc.)
9.  Choose a soft (feathered) brush and paint on your new layer over an object (hat, pants, overalls, etc.).  Don't worry about the bright, ugly color because we're going to adjust that in the next step.
10.  Next, adjust the opacity (transparency) of your painted layer by clicking the arrow next to OPACITY above the Layer.  Drag the arrow left or right to adjust the opacity. 

This is a quick example of the project:

Here are a few examples of adding color to a black & white photograph to create different effects:


If [for some reason] you don't see your layers, click F7.


Also, if you have access to YouTube you can check out this video tutorial that I put together a few years ago.  It's on a Macintosh, but the concepts are the same:

Photo Editing #3: Basic Retouching

BASIC RETOUCHING

Today we are going to explore some photo retouching.  Next we will be creating a "before and after" picture to save to our portfolios.

First we will get an original source image to work with:
  1. Begin by right-clicking the image below and selecting "Copy Image" or "Copy" (depending on which browser you are using). 
  2. Open Photoshop and select FILE > NEW
  3. Select EDIT > PASTE
  4. Use the tools I demonstrate in class to touch up the photograph 


Next we will create the Before & After picture:
  1. Select IMAGE > CANVAS SIZE
  2. Change your settings to "PERCENT"
  3. Click on the "Right Arrow"
  4. Change your Width to 200% and click OK
  5. You should now have an image with space on the left
  6. Copy the original image (from this web page) again
  7. Paste the image into your Photoshop document and drag it to the left (as the "before" image)
  8. Use the Text tool to add your name to the image.
  9. Save your image to your Thawspace as a PSD and as a JPG
Next we will upload these pictures to our portfolio:
  1. Open your Blogger account (you may want to open Gmail and then go to http://www.blogger.com/).
  2. Select your "Portfolio" page.
  3. Click "New Post"
  4. Click the "Image" button in the post window.
  5. Locate and select your picture (the JPG version), then click "OK"
  6. Click on the picture in your post and select the size you want it displayed.
  7. Write a brief summary of what this project is about (either before, after, or on either side of your image).
  8. Click "Publish"
  9. Click "View Blog" (at the very top of your window)

Finally, choose another picture that you can retouch.  I'm attaching a couple examples, but you can select another image if you like.  (I recommend clicking the picture to view it full-size before copying it.)