Tuesday, October 31, 2017

Bryce: Landscape 1: Island Sunset

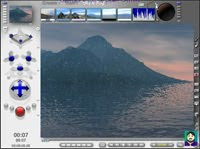
Today we will be using Bryce to create a basic island.  You will need to include some of the basics here including the flat plane, the "mountain" terrain, and water.  We will also be editing the "mountain", changing textures, and adjusting the sky/environment.  I will give some specific direction for this project in class.

SET UP BRYCE:

Go to: \\JHS-LAB-M16\Users\LabSoftware
Run: br_ap003_Bryce55

What I would like from you is the following:
  • Change the texture of the first Plane
  • Add a "Mountain" (Terrain)
    • Adjust it so it sinks slightly below the Plane
    • Edit the Terrain (click the "E")
      • Adjust the shape of the mountain
      • Add some Erosion
    • Change the texture of the Terrain
  • Add a Water Plane
    • Edit the texture of the Water
  • Change the Sky
    • Be creative and adjust fog, haze, colors, etc.

Also, if you would like to view a "video tutorial", I am including one below [if you can view the video inside the schools firewall].

Monday, October 30, 2017

One More Project!

I'm sorry that I am out another day.  I will be here tomorrow. 

Today I want you to create a project fully (see last weeks instructions), save images/screen shots/etc., and upload them to your portfolio.

Next, email me (askgriff@gmail.com) and let me know:

  1. What projects or programs have been your favorite so far?
  2. What sorts of projects or software applications would you like to explore?
  3. What can we do to make the class better?
Thanks for your patience!

Griff

Monday, October 23, 2017

Independent Projects: Your Choice

I apologize for being out this week.  I am hoping to be back Thursday, but there's a possibility that I will not be back until Monday.  That being said, I am giving you a choice of projects this week.

Software Address:  \\JHS-LAB-M16\Users\LabSoftware
Your options:
  • Use Sculptris to make some holiday models
    • Halloween could be a ghost or bat or monster or pumpkin or something.
    • Christmas could be a Christmas tree or ornaments or snow man, for example.
    • Easter could be a bunny or chick or Easter eggs or whatever.
    • A birthday could be a cake or a wrapped present
  • Use Sculptris to make a Jellico Blue Devil bust. (Download Head)
    • Add a flat base to the bottom so it could be an actual statue or bust
    • Pay attention to details (wrinkles, veins, hair, etc.)
  • Use Sculptris to make a famous person model. (Download Head)
    • Find some good source pictures on the Internet to model from
  • Use Sculptris to make a pendant model. 
    • Create some sort of model that you [or someone you know] would wear as a pendant -- but make sure to include a loop for a chain to go through.
I will look at the completed models and may bring in a 3D printer to print out some of the good designs.  Maybe we can get you started as a model designer on Thingiverse.
  • Use Sweet Home 3D to create your dream house.
  • Use Sweet Home 3D to create a business you would like to own.
  • Use Sweet Home 3D to create a Zombie Survival Bunker.
When finished... update your Portfolio Blog by putting pictures and a write-up about what you made.  I will be grading the rest of this course on class participation and your Portfolio Blog.  If you don't have a blog (or don't put your finished assignments on your blog) you will NOT get credit for the assignments.

Make Sure you have a finished Sea Creature.  When we get to Bryce, we will need that model.

Finally:  If you finish your project, start another one.  There's no reason to waste lab time when you could be making something.  Let's say you make a cool ghost model for Halloween -- make him a friend.  Maybe you make a cool pumpkin -- so make one with a carved out face.  You make a Christmas ornament -- make a set of them.  Be creative.  Be a maker.

Wednesday, October 11, 2017

Sculptris: Full Body

Download Body Model (If Desired): Click Here

If you want to import the head model you created yesterday:

  • CTRL+O (to open model)
  • Drag the mouse to create one sphere and left-click to place it in the scene
  • Use the SCALE tool to size your head
  • Move the head onto the shoulders 


Tuesday, October 10, 2017

Check Your Work

Before you get going today, please do the following:
  1. Look at the list of portfolios above to make sure I have your portfolio address. (If not, let me know what your address is -- ______________.blogspot.com)
  2. Make sure you have the following assignments on your portfolio:
    1. Veggie Head
    2. Sweet Home 3D House (3 pictures and a floor plan)
    3. Sweet Home 3D House from Floor Plan (3 pictures and a floor plan)
    4. Sculptris: First Project (anything creative)
    5. Sculptris: Sea Creature (with background)
    6. Sculptris: Head (todays project)
    7. Sculptris: Full Body (tomorrows project)
  3. Make sure your Google Drive (http://drive.google.com) is organized into folders.  You may want a folder for "Job Portfolio", "Sweet Home 3D", Sculptris, etc.  

Sculptris: Head

In our last assignment we used a program called Sculptris to create a water creature which we will be importing into an underwater scene in Bryce later on.  Today we are going to continue exploring Sculptris by creating a 3D head.

Although we learned the basics of drawing a human head/face, we don't HAVE to make our creations human.  Be creative.

In these examples (right) I created an alien, a human, and an elf-like head.

Remember to:
  • Save the Sculptris file to your folder.
  • Save the image (PNG or JPG) file to your folder
    • Click OPTIONS > SAVE IMAGE
  • Upload your PNG/JPG file to your Blogger
Download Model: Head


Monday, October 9, 2017

Drawing: Human Heads and Bodies

No, this isn't a drawing class -- but like the "Rule of Thirds" this technique can apply to many of our projects and designs.  Almost everybody who draws a face draws them out of proportion -- usually by placing the eyes too high on the head.

Please follow along with my presentation on the whiteboard so you have a better understanding of facial structures before you begin working on the head in Sculptris.
Notice that if you look at the human skull and divide it into a 4x4 grid, the eyes are directly in the center of the face.
By applying that same division to a human face, we can see that the line appears right on the top of the eyeball in most faces.
You may also notice that the width of the eyes usually equal the distance between the eyes -- and really, on the sides of the face as well.  This diagram shows 5 eye widths on the face.
Another interesting observation is that the center of the eye roughly lines up with the edges of the mouth, and the edges of the nose generally line up with the inside corners of the eye.

Notice in the finished drawing that the same line (now invisible) that ran across the top of the eyes also indicates where the ear joins the head.  Also notice that the eyebrows are not directly centered above the eyes.
You should keep these lines in mind if your figure is not looking directly at you.  Also remember that the head is really skull-shaped with "attachments" (nose, lips, hair, etc.).
While we are on the subject of proportions, this is an interesting general diagram showing human [male] body proportions.  Notice that "one head" is the unit of measure.  At the "second head" the line intersects the models chest -- at the 3rd, across the top of his naval... etc.
And this "sewing guideline" chart shows a few variations to the original.

Finally, here's a video demonstrating the facial proportions:


Friday, October 6, 2017

Sculptris: Sea Creature

Today we are going to be using Sculptris to create a "Sea Creature" -- or some other thing that we can put into our "Under Water Scene" when we get to Bryce.  There's really no right or wrong way to do this assignment (other than, "Oh, look... it's a bubble."), so get creative.

You can see from the examples below that there were several different approaches to this project -- some went for real creatures and some went for fanciful.  Notice the first picture in the set has an underwater background.  That is achievable by changing your background picture in Sculptris.


A student designed the following creepy creature in Sculptris...
Then put it in an under water scene in Bryce (another 3D program) later on.

IMPORTANT: I suggest saving regularly as Sculptris has a tendency to crash.  To do so, simply click the SAVE button (or do a CTRL+S) and save it to your Thawspace.  This will save it as a Sculpture file (.sc1).

When finished with your model, I would also like you to Export the file as an Object which we can use in other programs (such as Bryce).  To do so, simply click the EXPORT OBJ button (or do a CTRL+E) and save it to your Thawspace.  This will save it as a Wavefront (.obj) file.

Finally, I would like you to save an image of your file to include on your Blog Portfolio and your deviantART page.  Simply go to OPTIONS and then click on SAVE IMAGE and save it to your Thawspace.  This will save it as a PNG file.

So for each project you should have an SC1, an OBJ and a PNG file.
Thursday, October 5, 2017

Getting Sculptris

Sculptris is an interesting approach to 3D model creation -- sculpting.  Sculptris is a free program (download here) which helps you create models that you can import into other programs (like Bryce, for example).

Today we will be creating an organic shape with Sculptris.  Mostly we will be exploring the different tools, settings, and options -- but you will be turning your project in.

Begin by opening the Sculptris application from your desktop.

When finished, you can save an image by clicking Options (I don't know why) and the Save Image.

Here's a video tutorial (not by me) for beginning Sculptris -- although I will demonstrate at least this much during class.  I am providing it so students who are absent or need a refresher can watch again.


Next we will be attempting a head (monster, human, or otherwise).